Nail art tutorial: adorable 3D Easter bunny nails

Seasonal & Occasions, Step by Step
Scratch Stars Mixed Media Artist of the Year 2023 & Educator of the Year 2024, Melanie Lewendon, shares how to create this super-cute Easter bunny nail design.

“It took 15 minutes to create the bunny nail art, and I would charge £40 to £45 on natural nails for the full set, minus the 3D ears,” she says.
Are you enjoying this content?
Join our community to receive more like this
Are you enjoying this content?
Join our community to receive more like this
Products used:
- Halo Gel Polish in Swish and Matte Top Coat.
- Crystal Nails Aurora Flakes.
- Nail Artists UK gold and white L&P acrylic powders.
Step 1
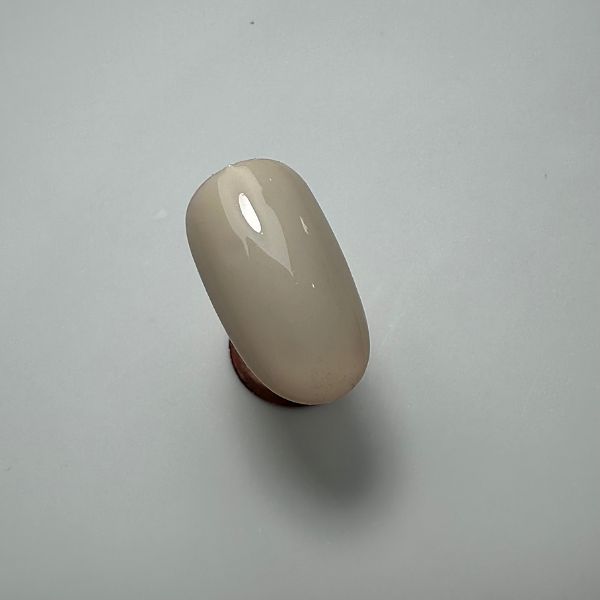
Apply your chosen gel polish base colour and cure.
Step 2
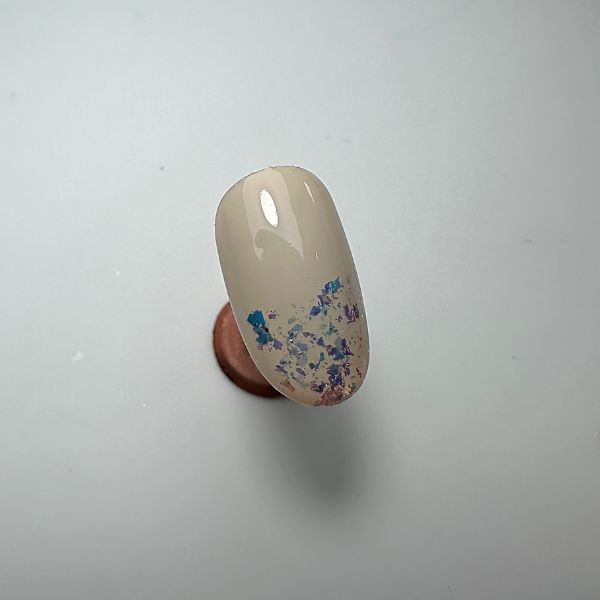
Press metallic flakes into a cured layer of the base colour coat.
Step 3
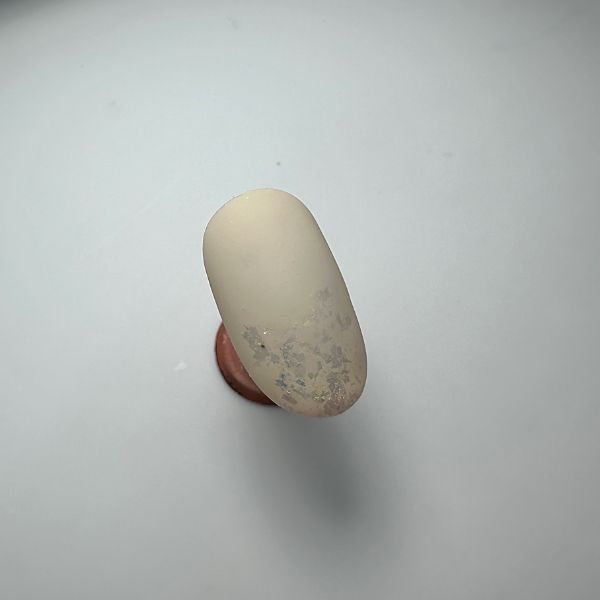
Apply matte top coat and cure.
Step 4
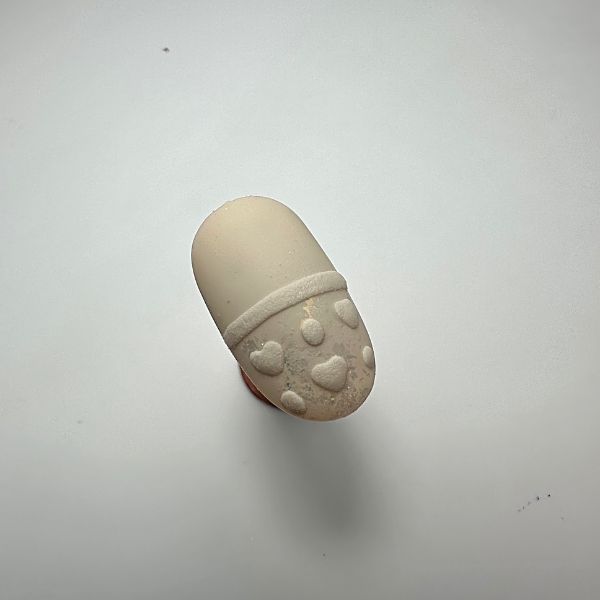
Using the base colour, paint a design onto the bottom half of the nail and sprinkle with clear acrylic power to create a sugared effect. Cure, then brush off any excess powder and apply fine glitter for a sparkly look.
Step 5
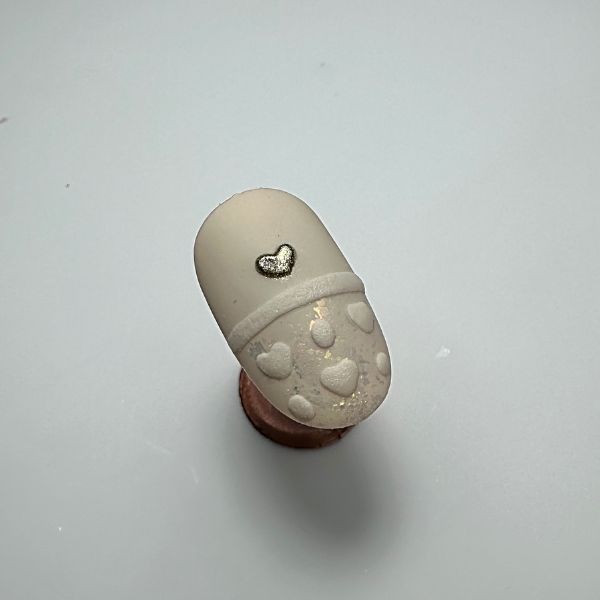
Paint a love heart onto the nail using a gold gel or acrylic paint, to create the bunny's nose.
Step 6
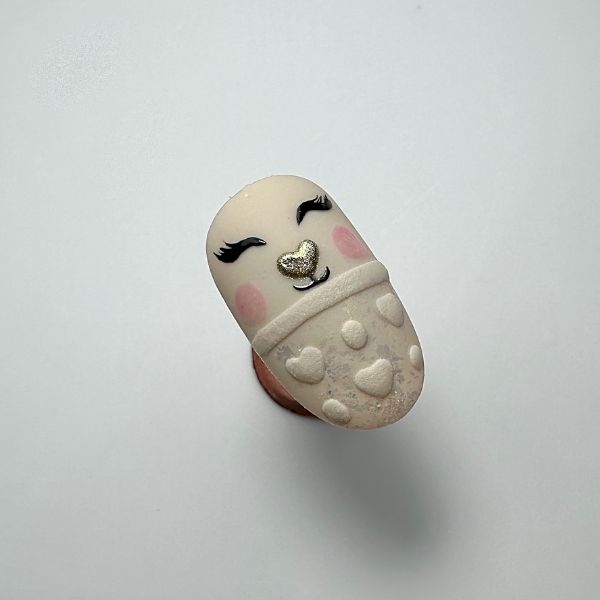
Paint lashes and the mouth with tack-free black gel paint. Mix pink pigment powder or pink gel with a no-wipe top coat to make a glassy pink gel, and paint rosy red cheeks. If the cheeks look tacky when cured, apply no-wipe top coat to them.
Step 7
Craft 3D ears using white L&P acrylic on an Arabella form. Apply gold metallic details and adhere to the nail.
Step 8
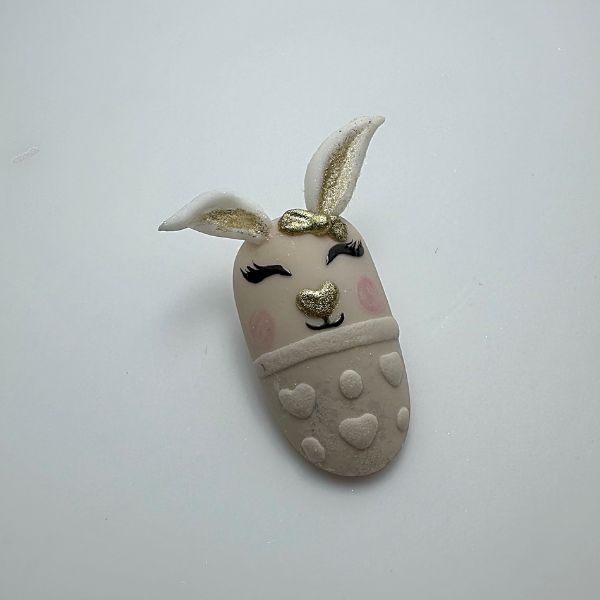
Add an acrylic bow, painting with the gold paint. If you do not want to add 3D elements, make the bunny's features smaller and paint the ears with white tack-free gel.
Step 9
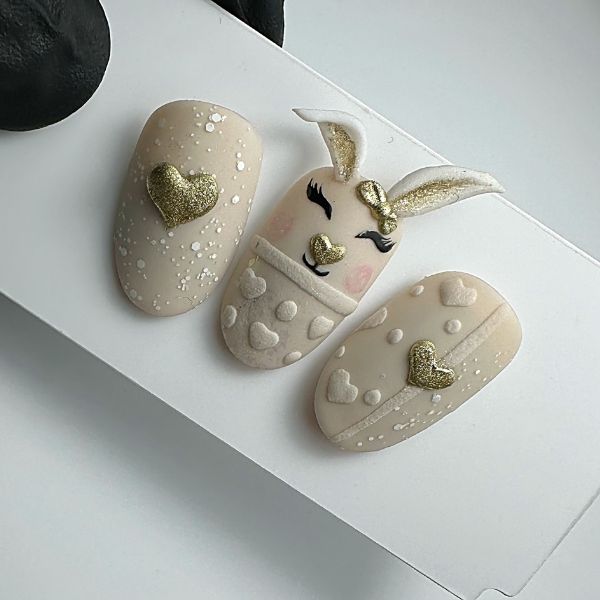
Use the same techniques to create designs on other nails.