Mickey Mouse pumpkin nail art: how to create for Halloween in 4 steps

Seasonal & Occasions, Step by Step, Themed
Nailchemy ambassador, Dannika Bernadette, uses products from the brand to create this Halloween look, and shares how to recreate it below…
Are you enjoying this content?
Join our community to receive more like this
Are you enjoying this content?
Join our community to receive more like this
Step 1
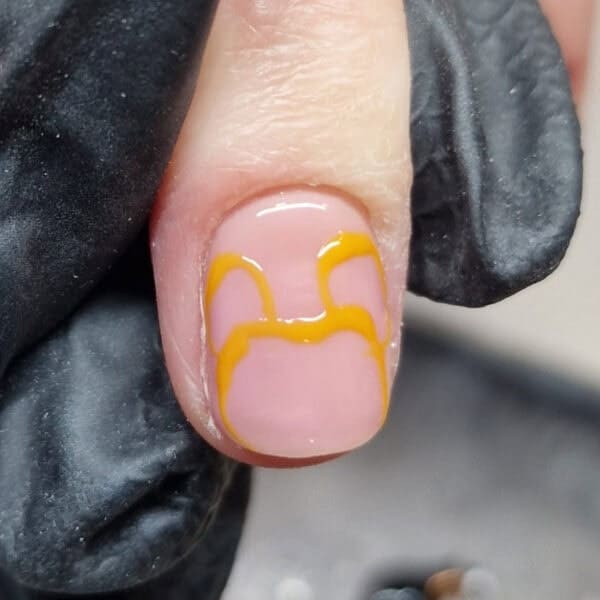
Paint a rough outline of the Mickey Mouse pumpkin, as shown. I used a custom mix of Nailchemy Artisan UV/LED Gel Paints in Yellow and Orange.
Step 2
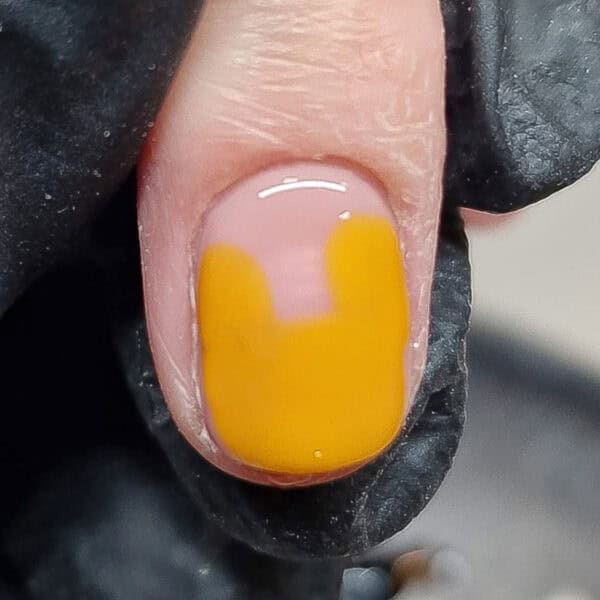
Fill in the shape and cure.
Step 3
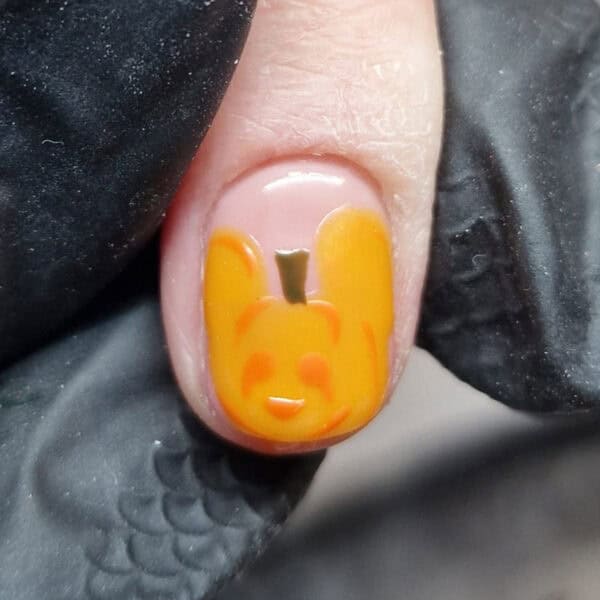
Using a deeper orange gel hue, paint shading and facial features onto the pumpkin. I used a mix of Nailchemy Artisan UV/LED Gel Paints in Green and Brown to add a stalk to the top. Cure.
Step 4
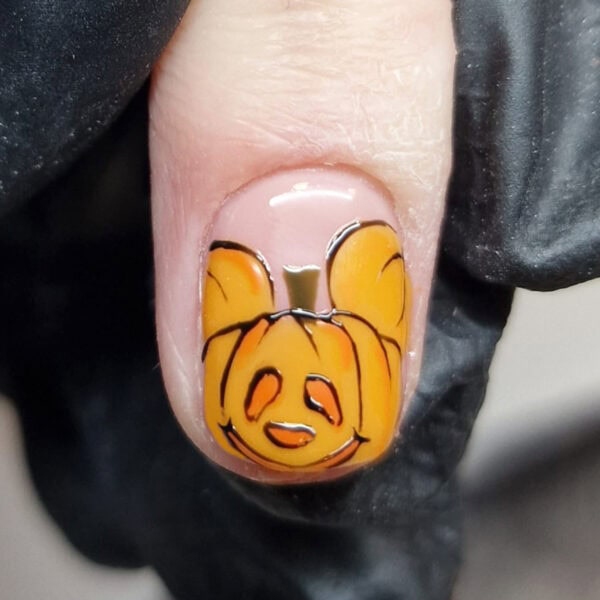
Use Nailchemy Artisan UV/LED Gel Paint in Black to outline the pumpkin and its details, and cure. Apply top coat and cure.